By Colin Foster
Updated November 2026
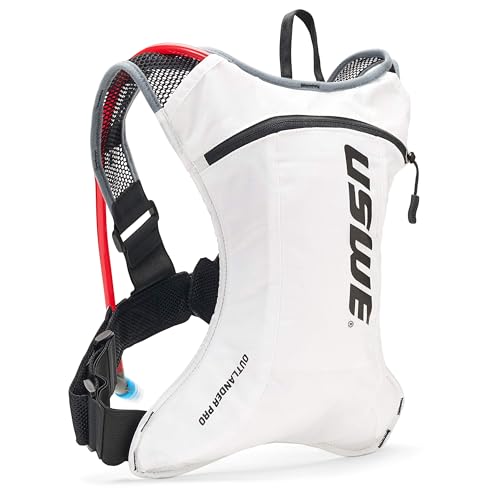
A daypack with water bladder combines a small hiking pack and a hydration reservoir in one system, so you can drink without stopping to dig out a bottle. This guide walks through how to pick the right capacity, check the bladder sleeve and hose routing, fit the pack to your torso, and pack it so the water stays where it belongs. By the end, you should be able to narrow a long list of models down to a few that match your hiking style.
Step 1: Decide How Much Water and Storage You Actually Need
Most people underestimate how much water they drink on the trail. Hydration needs depend on temperature, pace, pack weight and elevation, but a useful starting point is about half a liter per hour of moderate hiking in warm weather, and less in cool conditions. Plan your reservoir size around your longest water-to-water stretch, then add a margin.
Shopping for one? See our guide: 7 Best North Face Recon Daypack Options for Everyday Carry (2026).
Daypack capacities that pair with a bladder typically fall in the 15 to 30 liter range. Smaller packs suit short, well-supplied hikes. Larger ones leave room for a rain shell, extra layers, a first aid kit and food for a full day.
Common bladder sizes
Reservoirs are usually sold in 1.5, 2 and 3 liter versions. A 2 liter bladder covers most day hikes in mild weather. A 3 liter bladder suits desert routes, summer heat or trips where you cannot count on refilling.
Step 2: Check the Bladder Sleeve and Reservoir Fit
The sleeve is the padded compartment that holds the bladder against your back. Before you buy, check three things.
- Sleeve height and width. Manufacturers list the maximum reservoir dimensions. A sleeve that is too short forces the bladder to bunch up, which can cause leaks at the top seal.
- Load position. Look for a sleeve that sits close to the spine, not floating at the bottom of the pack. Water weight closer to your center of gravity feels more stable.
- Removability. A removable sleeve or a sleeve with a generous opening makes filling, cleaning and drying far easier.
Many packs are sold with a reservoir included, but some ship without one, and some reservoirs are not interchangeable across brands. If you already own a bladder, confirm its dimensions against the sleeve spec before committing.
Step 3: Evaluate Hose Routing and Bite Valve Access
A bladder is only useful if you can drink from it while walking. Hose routing determines how easily that happens.
- Look for shoulder strap clips or magnetic keepers that hold the hose at the chest.
- Check that the hose exits near the shoulder strap, not behind your arm, so it does not snag on branches.
- Confirm the hose length. Longer hoses can be shortened with a clip, but a hose that is too short will pull on the valve.
- Test the bite valve. Some designs require more suction than others, which matters on long climbs.
Hoses are the most common source of frustration with hydration packs. If you plan to wear a sternum or chest strap, make sure the hose route does not interfere with it.
Step 4: Fit the Pack to Your Torso
A daypack with water bladder carries its heaviest load close to your back, so fit matters. Measure your torso from the base of your neck (C7 vertebra) to the top of your hip bones. Most daypacks come in one or more torso lengths, and choosing the right one shifts weight onto your hips instead of your shoulders.
Once you have the pack on, check these points:
- The hip belt sits on your iliac crest, not on your waist or ribs.
- Shoulder straps curve over the top of your shoulders without lifting the pack away from your back.
- The load lifters (if present) angle at about 45 degrees.
- A sternum strap sits across your chest without restricting breathing.
Walk around with the bladder full before deciding. A pack that feels fine empty can shift when the reservoir is at two liters or more.
Chest straps and hydration
If you plan to add a chest strap, read the guide on Daypack with Chest Strap: How to Choose and Fit One for Hiking to see how strap placement interacts with hose routing.
Step 5: Pack the Bladder and Gear for Balance
How you load the pack affects comfort almost as much as fit. Follow this sequence.
- Fill the bladder and seal it fully. Lay it flat and check for leaks before loading.
- Slide the bladder into the sleeve with the top edge at the pack opening and the hose port facing out.
- Place lighter, compressible items such as a rain shell or extra layers in the main compartment, against the bladder.
- Put heavier items like food and a first aid kit in the middle, close to your back.
- Keep frequently used items, including snacks, sunscreen and a headlamp, in the top lid or side pockets.
A simple test: the pack should stand upright on its own when loaded, and the top of your load should not sit more than a few inches above the top of the pack.
Step 6: Plan for Cleaning and Drying
Bladders grow mold and bacteria if they stay wet. After each trip, empty the reservoir, rinse it with warm water, and clean the hose with a brush sized for the tube. Dry the bladder fully before storing, leaving it open or hung. Many hikers use a rack with the bladder hung upside down.
For a full drying routine, see Hydration Pack Drying Rack: How to Dry Your Bladder and Tube Fast.
Factors That Change the Right Choice
| Use case | Suggested pack size | Bladder size | What to prioritize |
|---|---|---|---|
| Short trail hikes, mild weather | 12 to 18 liters | 1.5 to 2 liters | Light weight, quick-access pockets |
| Full-day hikes, variable weather | 18 to 25 liters | 2 liters | Rain cover, torso fit, hose clips |
| Hot, exposed or remote routes | 20 to 30 liters | 3 liters | Large sleeve, insulated hose, stable load |
| Travel and mixed use | 20 to 28 liters | 2 liters | Organized compartments, removable sleeve |
Common Mistakes
- Buying a pack before checking bladder fit. Confirm sleeve dimensions against your reservoir.
- Ignoring hose length. A hose that pulls at the valve becomes annoying within the first hour.
- Loading heavy items at the bottom. This pulls the center of gravity down and makes the pack swing.
- Skipping the leak test. Fill the bladder over a sink before every trip.
- Storing the bladder damp. Mold can form in a few days and affects taste and hygiene.
- Relying on a single water source. A bladder holds what it holds. Carry a backup bottle or filter if your route has long gaps.
Tips for Getting More From Your Setup
- Freeze the bladder overnight with a small amount of water to keep drinks cooler through the morning.
- Use an insulated sleeve or hose cover on hot days, since sun exposure warms water quickly.
- Label your hose clip position so you can reattach it in the same spot after a break.
- Carry a small tube brush and a few spare o-rings in a pocket for field repairs.
Recommended gear
A few items are worth considering if you are setting up or upgrading a hydration daypack. Each of these is a real, widely sold product type, and you can compare current options using the links below.
- Osprey Hydraulics reservoir. Osprey’s reservoir line is designed to fit its own pack sleeves, which removes most sizing guesswork and includes a wide opening for cleaning. View on Amazon
- CamelBak Crux reservoir. A widely used bladder with a quick-release connection and a wide mouth, useful if you want to swap between packs. View on Amazon
- Hydration pack tube brush kit. A set of narrow brushes that reach the full length of the drinking tube, which helps prevent buildup. View on Amazon
- Hydration pack drying rack. A hanging or standing rack that keeps the bladder open to air while it dries, reducing mold risk. View on Amazon
FAQ
How much water should I carry in a daypack with water bladder?
A 2 liter reservoir covers most moderate day hikes in mild weather. Increase to 3 liters for hot conditions, exposed routes or long stretches without refill points.
Can I use a regular water bottle inside a hydration pack?
Most bladders are designed for their own sleeves and connectors. A bottle may fit in a side pocket, but it will not connect to the hose.
How do I keep the hose from freezing in cold weather?
Blow the water back into the bladder after each drink, or use an insulated hose cover. Carrying the pack inside your jacket during breaks also helps.
How often should I clean my bladder?
Rinse it after every trip and deep clean it with a bladder cleaning tablet or diluted vinegar solution every few weeks, or sooner if you notice odor or taste changes.
Is a hydration pack better than a water bottle for hiking?
Bladders make it easier to drink often in small sips, which many hikers find helpful. Bottles are simpler to clean and refill. The choice depends on how you prefer to drink and how much you value hands-free access.
Do I need a waterproof daypack for a bladder?
Not always, since the bladder itself is sealed. However, electronics and food in the main compartment benefit from a rain cover or dry bag, especially in wet climates.
How do I know if my bladder is leaking?
Fill it, seal it and set it on a dry towel for an hour. Check the towel, the cap seal and the hose connection. Replace any worn o-rings or the bladder itself if you find moisture.
Should I consult a professional about hydration needs?
If you have a medical condition affecting fluid balance, such as kidney disease or heart failure, or if you are hiking in extreme heat, consult a physician or certified sports dietitian for personalized guidance.
Conclusion
A daypack with water bladder works best when the reservoir size, sleeve fit, hose routing and torso length all match how you hike. Start with your longest water gap, check the sleeve dimensions, then test the fit with a full bladder before you head out. Clean and dry the system after every trip to keep it hygienic and reliable.
Related reading
- Travel Backpack With Daypack: 5 Best Picks Compared (2026)
- The North Face Jester Daypack: A Step-by-Step Guide to Sizing, Packing and Fit
Ready to choose one?
About Colin Foster
Colin Foster is part of our editorial team and reviews and edits our backpacks & packing systems guides, checking product details against manufacturer specifications and owner feedback.