By Colin Foster
Updated November 2026
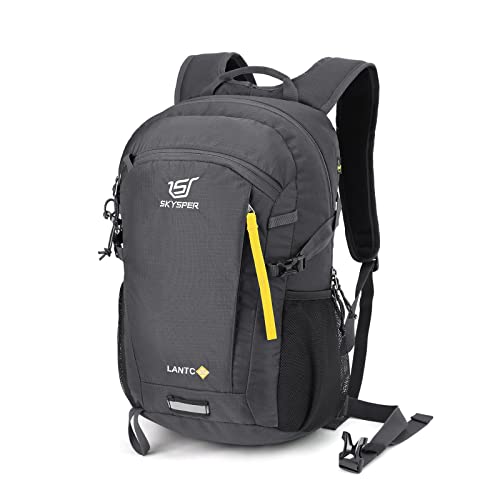
The cotopaxi lagos 15l hydration pack is a mid-size daypack with a built-in hydration sleeve, designed for hikes, trail runs and longer days outside where you need water, layers and a few extras in one place. This guide walks you through checking whether the pack suits your torso, setting up the reservoir, loading it so the weight sits well, and adjusting it on the move. By the end, you should be able to fit and load the pack in about ten minutes and avoid the errors that make most hydration packs feel bouncy or sloppy.
What the Cotopaxi Lagos 15L Is Built For
Cotopaxi makes the Lagos in several sizes, and the 15-liter version sits in the middle of the range. It suits day hikes of four to eight hours, bike rides, and summer trips where you carry a reservoir plus a light shell and snacks. It is not a multi-day pack. If you need to carry a sleeping bag or a bear canister, a larger frame will serve you better.
Shopping for one? See our guide: Cotopaxi Lagos 5L Hydration Hip Pack: 3 Best Options Compared (2026).
Manufacturers generally describe the Lagos line as a hydration-compatible daypack with a sleeve for a bladder, external stretch pockets and a lightweight suspension. Check the current specs on the product page before you buy, because sleeve dimensions and included accessories can change between production runs.
Step 1: Check Fit Before You Fill Anything
A hydration pack lives or dies on torso fit. Measure your torso length from the bony bump at the base of your neck (C7 vertebra) down to the top of your hip bones, roughly where a belt would sit. Compare that number to the pack’s listed back-length range. If you land between sizes, favor the shorter option for steep terrain and the longer one if you carry heavier loads.
Put the empty pack on and tighten the hip belt first. It should rest on the top of your iliac crest, not your waist. Then tighten the shoulder straps until the pack hugs your back, and bring the sternum strap across your chest at a comfortable width. Only then should you adjust the load lifters, the small straps angled up from the top of the shoulder straps. Set them to about 45 degrees. Loose lifters let the pack sag and pull your shoulders backward.
Quick fit checklist
- Hip belt sits on the hip bones, not the waist
- Shoulder straps curve over the top of the shoulders without gaps
- Load lifters angle roughly 45 degrees toward the head
- Sternum strap sits about one inch below the collarbone
- You can reach the bite valve without leaning forward
Step 2: Set Up the Hydration Reservoir Correctly
Most hydration packs in this class accept a standard reservoir, commonly in the 2-liter to 3-liter range. Confirm the sleeve size against the reservoir you plan to use before you buy one. Fill the bladder with cold water, then seal the cap and shake it gently to check for leaks over a sink.
Route the drink tube through the sleeve’s exit port so the bite valve reaches your shoulder on the side you prefer. Clip the tube to the shoulder strap with the pack’s keeper or a small magnetic clip. A tube that dangles will kink and collect water in the wrong places.
Filling and sealing steps
- Rinse the empty bladder with warm water to remove any manufacturing residue.
- Fill the reservoir through the wide opening, keeping the bladder level so it doesn’t trap air.
- Close the cap until it clicks or the gasket feels fully seated.
- Squeeze the bladder gently to push out air before you insert it into the sleeve.
- Slide the bladder into the sleeve with the tube port toward the exit hole, then thread the tube through.
- Test the bite valve by sucking gently while the pack is still on your back. Check for drips at the cap.
Cleaning and drying
Empty the reservoir after every outing. Wash it with warm water and a small amount of mild, unscented soap, then rinse thoroughly. Use a bladder cleaning brush for the interior and a tube brush or pipe cleaner for the drink tube. Hang the bladder open and upside down to dry completely. Trapped moisture is the main cause of odor and mildew in hydration packs.
Step 3: Load the Pack So the Weight Sits Well
Load weight in layers. Put the reservoir in the sleeve against your back, since it is already heavy and sits closest to your center of gravity. Place a lightweight, compressible item like a rain shell or insulated layer in the main compartment next. Heavier, dense items such as a first-aid kit, food or a camera belong in the middle, close to your spine, not at the top or bottom.
Keep items you may need during the day, like a headlamp, sunscreen or a snack, in the top lid or external pockets. Anything you won’t touch until camp goes at the bottom of the main compartment.
Loading priorities
| Zone | What to put there | Why |
|---|---|---|
| Against the back (sleeve) | Hydration reservoir | Heavy weight stays close to the body |
| Middle of main compartment | First-aid kit, food, electronics | Dense items keep the center of gravity stable |
| Bottom of main compartment | Spare layers, sleeping items you won’t need until camp | Out of the way until you need them |
| Top lid and front pockets | Headlamp, sunscreen, snacks, map | Quick access without unpacking |
| Side stretch pockets | Water bottle, trekking poles, small items | Easy to reach while moving |
If you want a deeper look at how volume and weight interact on a day pack, see the related breakdown in Hydration Pack Backpack Cycling: 3 Best Options for Every Ride (2026), which covers how different riders balance load across different pack shapes.
Step 4: Adjust the Pack on the Move
Stop after the first 20 to 30 minutes and recheck everything. Shoulder straps often loosen as the load settles, and the hip belt may need a quarter-turn tightening after the first climb. Check that the reservoir hasn’t shifted and that the tube is still clipped where you left it.
On descents, tighten the sternum strap slightly and pull the load lifters a little firmer to stop the pack from bouncing. On long climbs, loosen the hip belt a touch so your hips can move freely. Drink regularly in small sips rather than waiting until you are thirsty, since thirst lags behind actual fluid needs.
Common Mistakes to Avoid
- Overfilling the sleeve. A bladder packed to the brim pushes against the back and makes the pack feel top-heavy. Fill it to about 80 percent for a more comfortable carry.
- Skipping the leak test. A cap that isn’t fully sealed can soak the main compartment. Test over a sink before every first trip with a new bladder.
- Storing the bladder wet. Closed, damp reservoirs grow odor fast. Always dry it open.
- Leaving the tube dangling. A loose tube kinks, collects water and can freeze in cold weather. Clip it securely.
- Ignoring the hip belt. Carrying load on the shoulders alone causes fatigue and neck tension. Fit the hip belt first.
- Using hot water. Hot water can warp the bladder and degrade seals over time. Use cool or lukewarm water.
Tips for Getting More From the Pack
- Carry a small bottle of electrolyte tablets for hot days or long efforts, and keep the reservoir for plain water.
- Pack a spare bite valve or cap gasket. These small parts wear out and are cheap to replace.
- Practice drinking while walking at home before your first long hike so the motion feels natural.
- If you run with the pack, check how the load bounces at your normal pace and adjust the lifters before you start.
- Store the pack with the main compartment unzipped and the bladder removed to keep the fabric and seals fresh.
Recommended gear
A few accessories make the Lagos easier to live with. Pick items that match your trip length and water needs.
- Replacement hydration bladder in the 2-liter to 3-liter range. Having a spare lets you rotate and dry one while the other is in use. View on Amazon
- Bladder cleaning kit with brushes. A narrow tube brush makes drying and cleaning the drink line far easier than rinsing alone. View on Amazon
- Trekking poles with a lightweight design. Poles reduce load on the shoulders on steep ground, which helps the pack feel lighter over long days. View on Amazon
- Electrolyte tablets. Useful for hot or high-output days when plain water alone isn’t enough. View on Amazon
FAQ
Does the cotopaxi lagos 15l hydration pack come with a reservoir?
Product configurations vary, so check the listing for your specific color and version. Many buyers pair the pack with a separate bladder, so confirm the sleeve size and purchase a compatible reservoir if one isn’t included.
How much water can the sleeve hold?
Most hydration sleeves in this size class are designed for bladders up to about 3 liters. Filling to around 2 liters keeps the load comfortable for most day hikes.
Is the cotopaxi lagos 15l hydration pack suitable for running?
It can be used for trail running on shorter, moderate outings. Adjust the lifters and sternum strap carefully and test the fit at running pace before a long run, since loads bounce more than they do when hiking.
How do I stop the hydration tube from leaking?
Check that the bite valve is closed when not in use and that the bladder cap is fully sealed. Keep the tube routed so it doesn’t kink, and blow the water back into the bladder after drinking to clear the line.
How often should I clean the bladder?
Empty and dry it after every use. Do a deeper clean with warm water and mild soap every few weeks, or sooner if you use sports drinks or notice any odor. Manufacturers recommend following their care instructions for your specific bladder.
Can I carry a sleeping bag in the main compartment?
This is not recommended for a 15-liter daypack. Its main compartment is sized for day loads, and a bulky sleeping bag would compress the pack and throw off the balance.
Can I use a hydration reservoir with sports drinks?
Yes, but rinse the bladder thoroughly after each use, because sugary drinks encourage bacterial growth. Some people prefer to use plain water in the bladder and keep flavored drinks in a bottle.
Should I consult a professional about hydration needs?
If you have a medical condition affecting fluid balance, such as kidney or heart issues, or you’re exercising in extreme heat, check with a doctor or sports dietitian to set a fluid plan that suits you.
Conclusion
The cotopaxi lagos 15l hydration pack works best when the fit is dialed in first, the reservoir is sealed and clipped properly, and the load is arranged with heavy items close to your back. Adjust the straps after the first stretch of trail, drink in small regular sips, and dry the bladder open after every outing. Follow those steps and the pack should carry comfortably through a full day of hiking or riding.
Related reading
- 6 Best Cotopaxi Hydration Hip Packs of 2026: Our Picks
- Women's Running Hydration Pack: 3 Best Options for Every Run (2026)
Ready to choose one?
About Colin Foster
Colin Foster is part of our editorial team and reviews and edits our backpacks & packing systems guides, checking product details against manufacturer specifications and owner feedback.