 By Lauren Holland
Traveling with multiple cables and chargers often leads to a knotted mess inside your bag. The right organizer prevents tangles, protects your gear, and makes packing and unpacking faster. This guide covers the main types of cable organizers, how to coil cords without damaging them, and strategies for shrinking your overall cable kit so you carry only what you need.
What Needs Organizing
Before choosing an organizer, take stock of what you typically carry. A common travel cable kit includes:
- Charging cables: USB-C to USB-C, USB-A to USB-C, Lightning, and sometimes micro-USB
- Wall chargers: single-port or multi-port
- Power bank and its charging cable
- Laptop charger (if you bring one)
- Adapter plugs for international travel
- Wired earbuds or headphones
- Data transfer cables for cameras or external drives
The goal is to keep each item accessible without unwrapping a tangle every time you need to charge a device. A good organizer also protects connectors from bending or snapping inside a packed bag.
Roll Cases, Pouches, and Grid Boards
These three form factors cover most travelers’ needs. Each has strengths depending on how much gear you carry and how you prefer to access it.
Roll Cases
A roll case is a flat pouch that you unroll to reveal elastic straps or mesh pockets. You place each cable or charger in its own compartment, then roll the whole thing up and secure it with a strap or buckle. Roll cases are excellent for keeping cables separated and visible at a glance. They work well for medium-sized kits with four to eight cables plus a couple of chargers. When unrolled, everything stays in place, so you can grab what you need without disturbing the rest. The main trade-off is that a fully loaded roll case takes up more space than a simple pouch, and it requires a flat surface to unroll.
Pouches
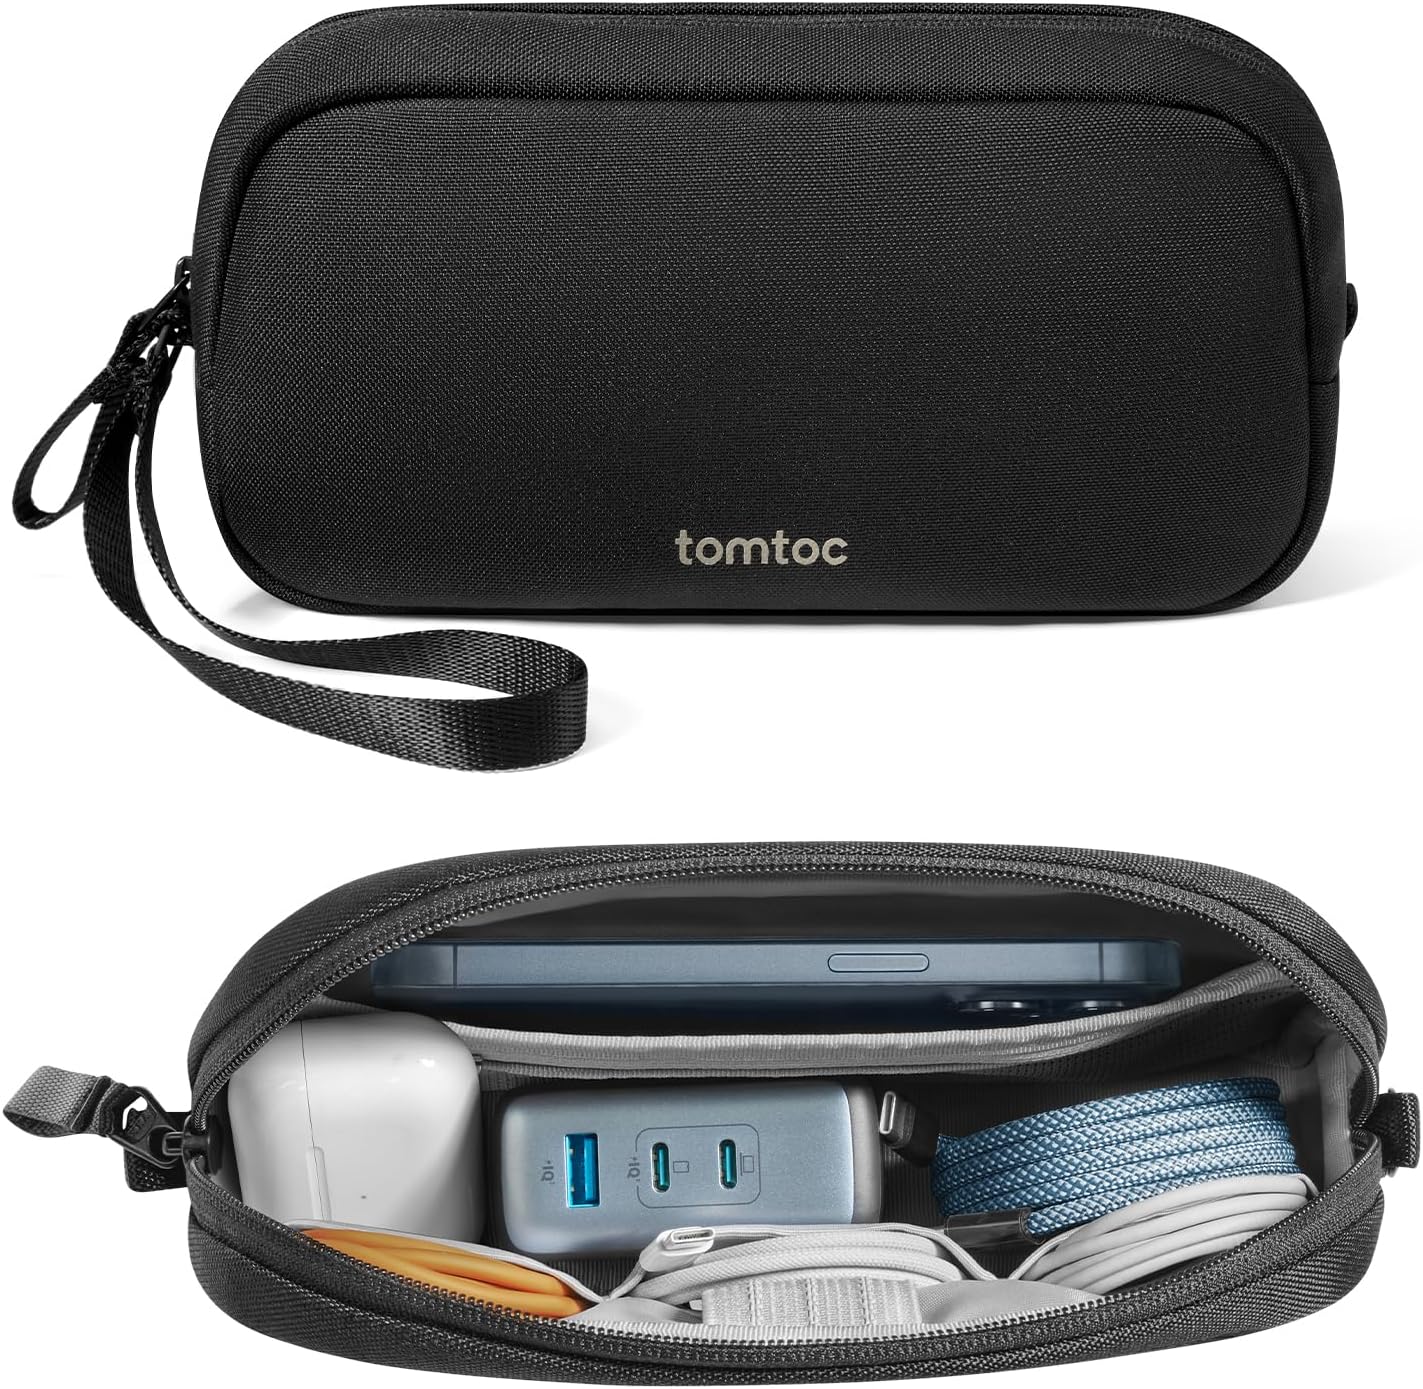
Simple zippered pouches are the most flexible option. You can toss in cables, chargers, adapters, and even a small power bank. To prevent tangles, use the pouch’s internal pockets or dividers if it has them. If it does not, you can add your own separators with small mesh bags or elastic bands. Pouches are ideal for minimalist travelers who carry only two or three cables and one charger. They also fit easily into a backpack’s front pocket or a carry-on’s side compartment. The downside is that without internal organization, cables can still tangle inside a pouch, so you may need to pair it with wraps or ties.
For a larger setup, a dedicated cable organizer bag with multiple compartments and a structured shape can keep everything in its place and protect connectors from pressure.
Grid Boards
An elastic grid board works like a mini pegboard. You stretch cables and chargers under the elastic bands, threading them through the grid to hold them flat. Grid boards are popular because they let you see every item at once and access any cable without pulling out the rest. They are especially useful for travelers who carry many cables of similar length because the grid keeps them separated. The main limitation is that grid boards are usually rectangular and may not fit well in rounded or small bags. Also, very thick cables or bulky chargers can be difficult to secure.
Wraps and Ties
Even with a good organizer, individual cables benefit from being secured before you place them inside. Wraps and ties prevent a single loose cable from tangling with the rest.
Hook-and-Loop Cable Ties
Reusable reusable cable ties are the most common solution. They come in various lengths and colors, allowing you to match ties to cable types or lengths. Wrap the tie around a coiled cable and press to secure. They are lightweight, inexpensive, and easy to adjust. The main drawback is that the hook side can snag on fabric or other cables if not positioned carefully.
Silicone Cable Straps
Silicone straps are stretchy bands that you loop around a coiled cable. They grip well without any hook-and-loop material, so they won’t snag. Silicone straps are also waterproof and easy to clean. They work best for single cables or small bundles. Because they are not adjustable, you need the right size for your cable’s coil diameter.
Cable Ties with Labels
Some cable ties include a small label window or a writable surface. These are useful if you want to mark which cable is for which device without relying on color alone. You can write the device name on the label with a permanent marker and change it later if needed.
Coiling Cables Without Damage
How you coil a cable affects its lifespan. Poor coiling can strain the internal wires, especially near the connector ends. Follow these guidelines to keep your cables working longer.
The Over-Under Coil
This technique, borrowed from audio engineers, reduces twisting and stress on the cable. Hold the cable near one connector. Make a loop by twisting your wrist one way, then make the next loop by twisting your wrist the opposite way. Alternate the twist direction for each loop. This creates a coil that lies flat and does not introduce kinks. It takes a little practice but is worth learning for expensive or delicate cables.
Loose Coils
For most travel cables, a simple loose coil works fine. Make loops that are at least four to six inches in diameter. Tight coils put more stress on the cable jacket and internal conductors. Avoid wrapping a cable tightly around a charger or a small object, as this can create sharp bends near the connector.
Use the Cable’s Own Flexibility
Some cables are stiffer than others. Braided cables tend to hold their shape better and resist kinking, while rubbery cables can develop permanent bends if left in a tight coil. Let the cable’s natural curve guide your coiling. If you feel resistance, loosen the loops.
Protect the Connectors
The weakest part of any cable is the joint between the connector and the cable jacket. Avoid bending this joint sharply. When coiling, leave the connector end straight for about an inch before starting the first loop. Some organizers include small slots or clips to hold the connector in place, which also protects it.
Shrinking Your Cable Kit
Fewer cables mean less to organize. You can often reduce your kit significantly without sacrificing functionality.
Multi-Port Chargers
A single multi-port wall charger replaces multiple single-port chargers. Look for one with at least two USB-C ports and possibly one USB-A port. Many modern multi-port chargers can deliver enough power to charge a laptop and a phone simultaneously. This one device can replace your laptop brick, phone charger, and tablet charger.
USB-C Standardization
If your devices use USB-C, you can carry one or two USB-C cables and use them for everything. Many newer laptops, tablets, phones, earbuds, and even some cameras charge via USB-C. If you have an older device that still uses micro-USB or Lightning, consider whether you really need to bring it. A single USB-C cable plus a small adapter dongle can cover both USB-C and older connectors if you must.
Short Cables
Short cables (one to three feet) are easier to coil and take up less space than standard three- to six-foot cables. For travel, you rarely need a long cable because you are usually near a power outlet or a power bank. A short cable is also less likely to tangle. Keep one longer cable for situations where the outlet is far from where you sit.
Power Bank as a Hub
If you carry a power bank, you can charge devices from it while the power bank itself charges from the wall, if the model supports pass-through charging. This can reduce the number of cables you need to have plugged in at once. Some power banks also function as wireless charging pads, eliminating the need for a cable for compatible devices.
Check Your Actual Needs
Lay out every cable you think you need for a trip. Then remove any that you have not used on your last two trips. Many travelers overpack cables “just in case.” A good rule of thumb is to carry one charging cable per device type and one spare for the most common connector.
Labels and Colors
Identifying cables quickly saves time and frustration. You can use color coding, physical labels, or both.
Colored Cable Ties
Use different colored hook-and-loop ties or silicone straps for different cable types. For example, red for a laptop charger, blue for a phone cable, green for earbuds. This works without any writing and is easy to maintain.
Colored Cables
Some cable manufacturers offer the same cable in multiple colors. If you buy cables in distinct colors, you can identify them at a glance. Braided cables often come in a wider range of colors than rubber ones.
Label Makers and Tags
A small label maker or adhesive tags let you write the device name directly on the cable or on a wrap. Use a permanent marker on a white hook-and-loop tie for a simple DIY label. For a more permanent solution, use heat-shrink tubing with printed labels, but this requires planning and cannot be changed easily.
Organizer Compartment Labels
If your roll case or pouch has multiple compartments, label each slot with the device name. This helps you return each cable to its designated spot and quickly find what you need. You can use small adhesive labels or a permanent marker on the fabric.
FAQ
How do I keep cables from tangling inside a pouch?
Use individual wraps or ties on each cable before placing them in the pouch. You can also add small mesh bags or elastic dividers inside the pouch to separate cables by type. Coiling each cable loosely before wrapping helps prevent knots.
Can I use a tech pouch for cables and other items?
Yes, a dedicated tech pouch works well for cables, chargers, adapters, and small electronics. For more detail on choosing one, see our Tech Pouch Buying Guide. If you also carry travel documents, a Travel Document Organizer can keep papers separate from your electronics.
What is the best way to coil a thick laptop charger cable?
Use the over-under coil technique to prevent kinks. Make loops about six to eight inches in diameter. Secure the coil with a hook-and-loop tie near the middle, not at the connector end. Avoid wrapping the cable tightly around the charger brick itself.
How many cables should I bring for a typical trip?
Bring one charging cable per device type you will use daily, plus one spare for the most common connector. If all your devices use USB-C, two cables are usually enough. Add a short cable for a power bank and a longer one for situations where the outlet is far away.
Choosing the right cable organizer depends on how much gear you carry and how you like to access it. A roll case keeps cables separated and visible, a pouch offers flexibility, and a grid board lets you see everything at once. Pair your organizer with good coiling habits and a few wraps or ties to keep cords tangle-free. Reducing your kit to a multi-port charger and USB-C cables simplifies everything further. Labeling with colors or tags makes finding the right cable instant, so you spend less time untangling and more time enjoying your trip.
About Lauren Holland
Lauren Holland is part of our editorial team and reviews and edits our backpacks & packing systems guides, checking product details against manufacturer specifications and owner feedback.