 By Colin Foster
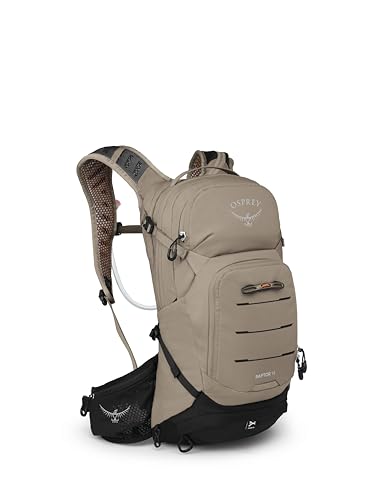
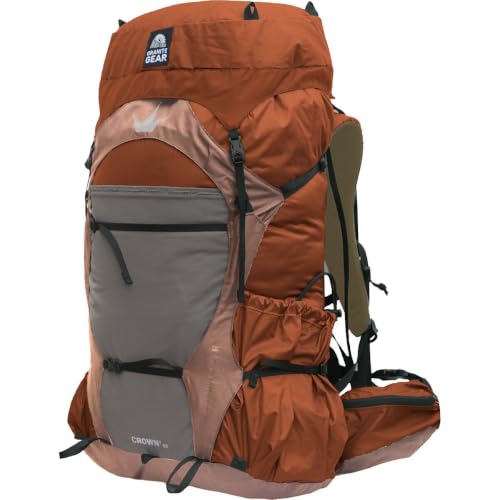
The North Face Surge daypack is a popular daypack for commuting, travel and light day hikes, and this guide explains how to decide whether it suits you, how to size and pack it, and how to get the most from its layout. By the end, you will know what volume and fit to look for, how to load the north face surge daypack so weight sits close to your back, and which setup mistakes to avoid. Most of the advice applies to any similar 25 to 35 liter daypack, so it is useful even if you are comparing models.
What the North Face Surge Daypack Is Designed For
Before you think about packing, it helps to understand what kind of bag you are working with. Daypacks in this class usually sit between roughly 20 and 35 liters, and the category covers everything from minimalist hiking packs to laptop-friendly city bags. Manufacturers generally position the Surge line as a versatile carry for daily use with enough structure to handle a day outside, rather than a dedicated technical pack for scrambling or multi-day trips.
That positioning shapes how you should use it. A bag built for everyday loads works well for a laptop, a layer, a lunch, water and a small first aid kit. It becomes less comfortable when you push it toward heavy loads for long distances, because the frame and hip structure are typically lighter than those of a dedicated backpacking pack. Check the current product page for the exact capacity, materials and suspension details, since specifications can change between production runs.
Who Tends to Get the Most Out of It
- Commuters who want a bag that handles a laptop, a change of clothes and a water bottle.
- Casual hikers doing trails of a few hours where food and water add up to 5 to 10 pounds.
- Travelers who need a carry-on-friendly day bag for sightseeing.
- Students who carry textbooks and a laptop and want a padded sleeve.
Step 1: Confirm the Fit Before You Pack
A daypack that fits poorly will feel heavy even when it is light, so fit comes first. Measure your torso length from the bony bump at the base of your neck (C7 vertebra) down to the top of your hip bones, roughly where a belt would sit. Many bags are sized by torso length rather than by total height, and sizing charts from manufacturers list these ranges. Owners often report that a bag that is too long lets the load sit low and swing, while one that is too short pushes weight onto the shoulders.
Once you have the bag on, adjust it in this order:
- Loosen the shoulder straps completely, then put the bag on.
- Fasten the hip belt and tighten it so the padding rests on your hip bones, not your waist.
- Tighten the shoulder straps until the bag sits close to your back without pulling you backward.
- Adjust the load lifters (the short straps at the top of the shoulder straps) to angle the top of the pack slightly toward your body, usually around 30 to 45 degrees.
- Check that the sternum strap sits across your chest, not against your throat, and clip it.
Step 2: Plan Your Load Before Packing
Most daypack problems come from packing without a plan. Sort your gear into three groups before you open the main compartment: heavy items, items you need during the trip, and soft or bulky items. A simple way to estimate your total load is to weigh each group on a kitchen scale if you have one, or to write down the approximate weight of each item.
| Item | Typical weight range | Where to pack it |
|---|---|---|
| Laptop in sleeve | 2 to 4 lb | Padded sleeve, against back panel |
| Water (1 liter) | 2.2 lb | Center of main compartment or side pocket |
| Insulated layer | 0.5 to 1 lb | Top of main compartment |
| Rain shell | 0.5 to 1 lb | Top or outer pocket for quick access |
| Snacks and lunch | 0.5 to 1.5 lb | Upper main compartment |
| First aid kit | 0.3 to 0.8 lb | Lid pocket or top compartment |
Step 3: Pack the North Face Surge Daypack for Balance
Packing order matters more than most people expect. The goal is to keep the heaviest items close to your spine and between your shoulder blades and your lower back, with the center of gravity roughly at the level of your hips. A pack that carries weight high and far from your back will pull you backward and fatigue your shoulders within an hour.
The Packing Sequence
- Slide the laptop or other flat, heavy item into the back panel sleeve so it sits flush against your back.
- Place your water reservoir or bottles near the middle of the main compartment, in line with your spine.
- Fill the remaining space with medium-weight items like food and a spare layer, keeping them compressed.
- Put soft, light items (a rain shell, gloves, a hat) at the top or in the lid, where they are easy to reach.
- Store anything you may need on the trail, such as sunscreen or a phone, in an outer pocket.
Using Compression to Reduce Sway
Once the bag is loaded, cinch the compression straps on the sides. Compression pulls the contents tight so they do not shift when you walk or climb. Owners often find that a half-full pack with loose contents feels less stable than a full pack with everything compressed. Tighten the straps until the load feels solid, then check that the zippers still close without strain.
Step 4: Adjust During the Trip
A pack that fits well at the trailhead can start to feel wrong after an hour, usually because you have eaten, drunk water, or added or removed a layer. Stop every hour or so to readjust. Loosen the hip belt slightly if your hips feel bruised, and tighten the shoulder straps if the bag starts to drop. If the load shifts, stop and repack instead of pushing through.
Common Mistakes to Avoid
- Packing heavy items at the bottom. Weight low in the bag pulls on the lower back and makes the pack feel unstable.
- Ignoring the hip belt. The hip belt carries a meaningful share of the load when it is cinched properly. Riding it loose shifts everything to the shoulders.
- Overfilling a daypack. Stuffing the bag beyond its capacity strains the zippers and seams and makes compression impossible.
- Forgetting to tighten compression straps. Loose contents shift, rattle and throw off your balance.
- Skipping the test walk. Walk around the house or block with your loaded pack before a long outing to find pressure points.
Tips for Getting More from Your Daypack
- Keep a small pouch of repair items, such as a few zip ties, a repair patch and a multi-tool, for quick fixes on the trail.
- Store frequently used items in the same spot each time so you are not digging through the bag.
- Rinse the bag and air dry it fully after wet trips to protect the fabric and any coatings.
- If you carry a laptop, check that the sleeve closes securely and does not put pressure on the zipper.
- Consider a rain cover or a waterproof liner if you hike in frequent rain, rather than assuming the fabric will keep everything dry.
Recommended gear
These items pair well with a daypack and address common needs on day outings.
- Hydration bladder with a hose. A bladder lets you drink without stopping and keeps weight centered along your spine. View on Amazon
- Packing cubes. Cubes sort small items such as cables, snacks and first aid supplies so they do not shift and pile up. View on Amazon
- Dry bag liner. A lightweight liner protects electronics and clothing from rain and sweat. View on Amazon
- Compact rain cover. A cover slips over the pack in a downpour and keeps the fabric and contents drier. View on Amazon
For more options in the same category, see 9 Best North Face Waterproof Daypack Options for Wet Weather Hiking if you hike in frequent rain, or 7 Best North Face Recon Daypack Options for Everyday Carry (2026) if you want to compare a related everyday model. If you carry a bag for work or travel and prefer domestic production, Made in USA Daypack: 8 Best American-Made Daypacks for Everyday Use (2026) covers that angle.
FAQ
Is the North Face Surge daypack good for hiking?
It works well for short to moderate day hikes where your load stays light to moderate. For long, steep, or heavy-load hikes, a dedicated hiking pack with a stiffer frame and more adjustable suspension is usually more comfortable.
Can the North Face Surge daypack carry a laptop?
Many models in this line include a padded sleeve for a laptop. Check the product page for the sleeve size, since laptop dimensions vary, and make sure the sleeve closes without strain.
How do I choose the right size?
Measure your torso length and compare it to the manufacturer’s sizing chart. Pick the size that matches your torso range rather than your overall height, since torso length drives how the pack sits on your back.
How much weight can a daypack like this carry comfortably?
Most daypacks in this class are designed for loads that stay well under 20 pounds. Owners often report that loads above about 15 pounds feel noticeably harder to carry without a supportive frame, so keep heavier trips in mind when planning.
Should I use the hip belt on a daypack?
Yes, if the pack has one and your load is more than a few pounds. A properly tightened hip belt shifts weight to your hips and reduces shoulder fatigue.
How do I keep the bag dry in rain?
Use a rain cover or a dry bag liner, and keep electronics in sealed pouches. Water-resistant fabric slows water down but does not make the bag waterproof in a sustained downpour.
How do I clean a daypack?
Spot clean with mild soap and water, rinse thoroughly, and air dry away from direct heat. Check the care label or manufacturer guidance before machine washing, since many packs should not be machine washed.
Where can I find replacement parts?
Contact the manufacturer’s customer service for replacement zippers, buckles or straps. Some repairs are easier to handle through a professional repair service, particularly for stitched or structural damage.
Conclusion
The North Face Surge daypack is a flexible option for commuting, travel and light hiking when it is fitted and packed properly. Start with torso measurement and a careful fit, then load heavy items close to your back and compress the contents. Adjust during the day and avoid the common mistakes above, and the bag will carry comfortably for most everyday outings.
Ready to choose one?
About Colin Foster
Colin Foster is part of our editorial team and reviews and edits our backpacks & packing systems guides, checking product details against manufacturer specifications and owner feedback.