By Colin Foster
Updated November 2026
A chest rig with hydration pack pairs a small front-mounted harness, which holds snacks, phone and small essentials within easy reach, with a bladder-equipped carrier that handles water and bulk gear. In this guide you will learn how to decide whether that combination suits your activity, how to fit and load it correctly, and how to avoid the common problems that make these setups feel awkward on the trail.
What a Chest Rig With Hydration Pack Actually Does
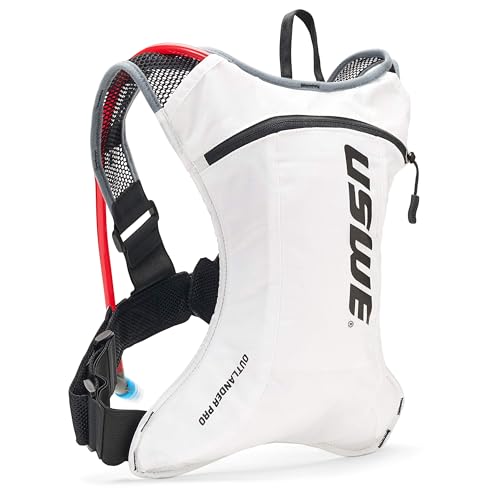
A chest rig is a lightweight harness, usually made from elastic webbing with a few zippered or stretch pockets, that sits across the sternum and sometimes around the ribs. A hydration pack is a backpack with a water bladder, typically between 1.5 and 3 liters, and a drinking tube that routes over your shoulder. When people combine the two, the chest rig becomes the fast-access layer and the hydration pack becomes the carrying capacity. Owners often report that this split keeps frequently used items off the back, where reaching them means stopping or shrugging out of a pack.
Shopping for one? See our guide: 7 Best Top Rated Running Hydration Packs (2026): Expert Picks.
The idea works best for activities where you repeatedly grab small things: gels, a map, a phone, a headlamp, or trekking poles that clip to the front. It works less well for multi-day trips where you need compressed storage for sleeping gear and food. Treat the chest rig as a supplement to your pack, not a replacement for proper load-carrying structure.
Step 1: Decide Which Layer Carries What
Before buying or adjusting anything, sort your gear into two groups: items you reach for every few minutes, and items you touch only at stops. Frequent items belong on the chest rig. Stop-only items, including the spare layer, first-aid kit and rain shell, belong in the hydration pack.
- Chest rig candidates: energy gel or chews, phone in a secure pocket, small trail map, car key, lip balm, sunglasses case, a whistle.
- Hydration pack candidates: insulated layer, rain jacket, first-aid kit, emergency bivy, extra food, tools, camera.
- Keep sharp or heavy objects away from the chest. Anything over roughly 200 grams in a chest pocket will pull on the harness and shift when you run or climb.
Step 2: Fit the Hydration Pack First
Fit the hydration pack before you attach the chest rig, because the pack determines where your shoulders and hips sit. Most packs with a hip belt are designed so that roughly 60 to 80 percent of the load rides on the hips. Adjust the sternum strap so it sits just below your collarbones, and tighten the shoulder straps until the top of the pack is close to your shoulder blades without pulling backward.
Setting the Torso Length
Measure from the C7 vertebra, the bony bump at the base of your neck, down to the iliac crest, which is the top of the hip bone. Choose a pack whose torso range covers that number. A pack that is too long will sit low and rock; one that is too short will press the bladder into your lower back.
Positioning the Bladder
Fill the bladder with the amount you expect to drink in the first hour, then hang it in the sleeve so the weight rests against your back, not your tailbone. A full 2-liter bladder weighs about 2 kilograms, so position matters.
Step 3: Attach and Adjust the Chest Rig
Once the pack is set, slip the chest rig on over the top. Most designs use a single strap across the sternum and a second strap around the ribs or waist. Tighten the rig until it stays put when you raise your arms overhead, but leave enough room to breathe fully. If the rig pulls the pack straps forward or pinches the chest, loosen the sternum strap of the pack slightly and recheck.
Make sure pockets do not overlap the hydration tube routing. A common setup routes the drinking hose over the right shoulder, so keep the right-side chest pocket free of bulky items that would block the tube from settling.
Step 4: Load Both Layers for Balance
Balance matters more than total weight. A chest rig loaded only on one side will tilt the harness and rub on that shoulder over a long run. Split the chest pockets evenly, then place heavier items in the hydration pack low and close to your back. Keep the pack’s center of mass within a hand’s width of your spine.
| Item | Where to place it | Why |
|---|---|---|
| Phone (approx. 200 g) | Chest rig, zippered pocket | Quick access, secured against bounce |
| Gels and chews | Chest rig, stretch pocket | Grab without stopping |
| Map or small notebook | Chest rig, flat pocket | Flat items sit still and stay dry |
| Rain shell | Hydration pack, top compartment | Reachable at a stop, out of the way while moving |
| First-aid kit | Hydration pack, lower main compartment | Low weight keeps balance stable |
| Spare water | Bladder, sleeve against back | Keeps weight close to the spine |
Step 5: Test the Setup on a Short Route
Do not test a new chest rig with hydration pack on a long or technical outing. Run or hike a loop of 30 to 60 minutes on familiar ground. During the test, drink from the tube several times, reach into each chest pocket, bend over, and climb a short incline. Note any rubbing, shifting or hose tugging.
- Check for rubbing under the sternum strap after 20 minutes.
- Confirm you can reach the phone and gels without breaking stride.
- Watch for bladder slosh; if it sloshes loudly, fill it less or add a baffle.
- Look for hose tug when you turn your head.
- Adjust straps, then repeat the test before a longer outing.
Step 6: Plan the Maintenance Routine
Chest rigs and hydration packs both pick up sweat, grit and sugar from energy drinks. After each outing, empty and rinse the bladder, dry the tube by blowing air through it, and wipe the harness. Store the bladder open to air. Mildew in a hose is one of the most common reasons these systems smell or taste off, so drying thoroughly matters.
Common Mistakes
- Overloading the chest. Heavy items on the chest rig bounce and tire the shoulders. Move anything substantial to the pack.
- Skipping the pack fit. Tightening the chest rig before the pack is set can push the pack down and forward.
- Ignoring hose routing. A tube caught under a chest pocket will kink and stop water flow mid-climb.
- Filling the bladder to the top. A full bladder moves more. Fill it to the level you will drink from in the next hour.
- Assuming one size fits all. Chest rigs come in fixed strap lengths; check the chest measurement range before buying.
Tips for Better Results
- Use a bladder with a quick-disconnect hose so you can remove it without emptying the whole rig.
- Carry a few gels in an outer pocket so you can fuel without unzipping anything.
- Pack items in the same place every time to build muscle memory on the trail.
- If you use trekking poles, check that the chest rig does not block the pole handle clip.
- Read our overview of how different harness designs compare in 7 Best Hydration Packs for Biking Compared (2026) before you commit to a style.
Recommended gear
Look for a chest rig with stretch pockets and a sternum adjustment that works with your pack. Fit-focused systems from established trail brands are a practical starting point, and a bladder with a quick-disconnect hose makes cleaning much easier. A small cleaning kit and a bladder dryer also help keep the system from developing odors.
- A trail-running chest rig with stretch front pockets, because elastic panels hold soft items without sagging. View on Amazon
- A 2-liter bladder with a quick-disconnect hose, which lets you refill and clean without disassembling the whole pack. View on Amazon
- A bladder cleaning kit with brushes for the hose and reservoir, which prevents the mildew that most often ruins the taste. View on Amazon
FAQ
Can I use a chest rig with any hydration pack?
Not always. The chest rig must match the pack’s sternum strap width and the way the hose routes. Check that the pack has a sternum strap you can adjust independently, and confirm the hose clip sits where the rig’s pocket will not block it.
How much weight should go on the chest?
Keep chest loads light, ideally under about 200 grams in each pocket and evenly split between sides. Heavier items belong in the pack, low and close to your back.
Does a chest rig make breathing harder?
It can if the straps are too tight. Adjust the sternum strap so you can take a full breath, and loosen the rig before a hard climb if you notice restriction.
How do I stop the bladder from sloshing?
Fill the bladder partway, use internal baffles if your model has them, and keep it in the sleeve against your back. Less water in the bladder means less movement.
How often should I clean the bladder?
Rinse it after every use and do a deeper clean with a bladder cleaning tablet or mild soap every few weeks, or sooner if it starts to smell. Always dry it fully before storing.
Is this setup good for multi-day trips?
It can work for day hikes and fast outings, but multi-day loads usually need a pack with a structured frame and compression for sleeping gear. Use the chest rig only for fast-access items on those trips.
Will a chest rig fit a kid or a small adult?
Many chest rigs have adjustable straps, but check the chest measurement range on the product description. A rig that is too large will slide, and one that is too small will dig in under the arms.
Conclusion
A chest rig with hydration pack works well when you split your gear by how often you need it, fit the pack before adding the rig, and balance loads on both sides. Test the setup on a short loop, then build a simple cleaning routine so the bladder stays fresh. With those steps, the system stays out of the way and keeps essentials within reach.
Related reading
- Women's Running Hydration Pack: 3 Best Options for Every Run (2026)
- West Slope Hydration Pack: 4 Best Options Compared (2026)
- Water Buffalo Hydration Pack: 3 Best Options for Trail and Rave Days (2026)
Ready to choose one?
About Colin Foster
Colin Foster is part of our editorial team and reviews and edits our backpacks & packing systems guides, checking product details against manufacturer specifications and owner feedback.