 By Colin Foster
Updated November 2026
A hiking backpack with internal frame gives you a stable, close-fitting load that moves with your body. In this guide you will learn how to match a pack to your torso length and trip type, how to judge frame stiffness and load rating, and how to pack so the weight sits where it should. By the end you will have a short list of specs to check before you buy or borrow one.
What an Internal Frame Actually Does
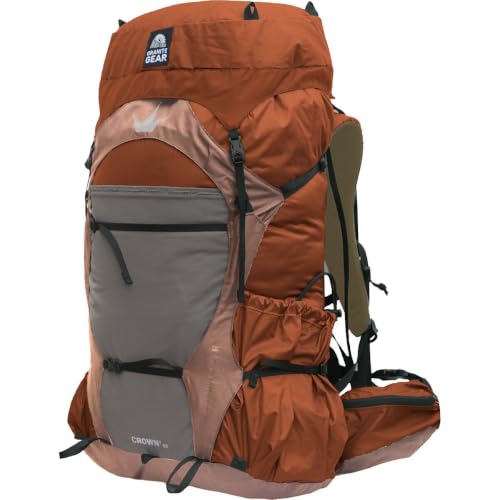
An internal frame is a set of stays, a sheet or wire frame, and sometimes a foam or plastic frame sheet hidden inside the pack body. Unlike an external frame, which holds the pack away from your back on visible metal rods, an internal frame keeps the load close to your spine. That closeness improves balance on uneven ground, reduces side-to-side sway, and lets you move through brush, scramble over rock, or duck under low branches without catching the pack on everything.
Shopping for one? See our guide: 4 Best Hiking Backpack Women's (2026): Expert Picks.
Internal frames also tend to fit a wider range of body shapes. Because the pack hugs the back, adjusting the torso length and hip belt does most of the work. The tradeoff is that a poorly adjusted internal frame pack can feel stiff or hot, and it may not carry very heavy, awkward loads as comfortably as an external frame design.
Step 1: Measure Your Torso Length
Torso length, not overall height, determines the size of pack you need. Hiking packs are sized around the distance from the bony bump at the base of your neck (C7 vertebra) down to the top of your hip bones.
- Have a helper measure while you stand upright with your head level.
- Find the C7 bump by tilting your head forward; it is the most prominent bone at the base of your neck.
- Measure straight down the spine to the top of the iliac crests, the points on your hip bones you can feel with your palms.
- Compare the number to the manufacturer’s torso range. Most packs list small, medium, and large ranges in centimeters or inches.
If your measurement falls between two sizes, many manufacturers recommend the size whose range you fit more comfortably in the middle. Always check the chart for the specific model, since sizing varies between brands. A pack with a torso adjustment system can cover a wider range, which is useful if you are between sizes.
Step 2: Choose the Right Volume for Your Trip
Volume is measured in liters and tells you how much space the pack holds. Matching volume to trip length keeps you from overpacking or carrying empty space that shifts around.
| Trip type | Typical volume range | Notes |
|---|---|---|
| Day hike (under 8 hours) | 20 to 35 L | Often a daypack, but some internal frame packs go this small |
| Overnight or two nights | 35 to 50 L | Enough room for a tent, sleeping bag, and food |
| Three to five days | 50 to 65 L | Common range for internal frame hiking packs |
| Longer or winter trips | 65 L and up | Bulky gear such as insulated layers and extra fuel |
Keep in mind that gear bulk matters as much as volume. A 60-liter pack filled with a fluffy sleeping bag may feel smaller than a 50-liter pack holding dense, compressed gear.
Step 3: Check Frame Stiffness and Load Rating
The frame is what separates an internal frame hiking backpack from a soft pack. Frame stiffness and the manufacturer’s load rating tell you whether the pack can handle your planned weight.
- Frame stays: Aluminum stays give more rigidity than plastic. Some packs use a single curved stay, others use two or more.
- Frame sheet: A thin, shaped sheet of HDPE or similar plastic distributes weight across the back and adds stiffness.
- Load rating: Manufacturers often specify a recommended load, commonly in pounds or kilograms. Exceeding it can cause the pack to sag or the hip belt to lose effectiveness.
- Stiffness test: Hold the empty pack upright by the top. A good frame feels firm and keeps its shape. A floppy pack may be fine for light loads but will struggle with heavy ones.
Step 4: Evaluate the Hip Belt and Suspension
For most hikers, the hip belt carries the majority of the pack weight. A well-fitted belt sits on the crest of your hips, with the padding centered over your hip bones.
Hip belt checklist
- Padding wraps the hips without digging into the sides.
- The belt is wide enough that the pads cover the hip bones.
- You can tighten it fully without pinching.
- The stabilizer straps (load lifters) at the top of the shoulder straps can pull the pack close to your back.
Shoulder straps and back panel
Shoulder straps should curve around the top of your chest without gaps. The back panel should contact your spine along its length. Mesh or ventilated back panels reduce sweat buildup, but they can feel less stable under very heavy loads.
Step 5: Pack for Balance
Loading an internal frame pack correctly improves comfort more than most buyers expect.
- Place the heaviest items, such as food, water, and fuel, in the center of the pack, close to your back and between your shoulder blades.
- Put medium-weight items, such as clothing and a sleeping bag, around the heavy core.
- Keep items you use often, like rain gear, snacks, and maps, in the top lid or side pockets.
- Store your sleeping bag in the bottom compartment if the pack has one, or compress it along the base.
- Tighten the compression straps so the load does not shift on the trail.
- Adjust the hip belt first, then the shoulder straps, then the load lifters.
For a deeper look at fit, see Mystery Ranch Hiking Backpack Guide: Sizing, Fit and Packing Tips, which walks through packing and adjustment in more detail. If you are comparing frame types specifically, Hiking Backpack with Frame: How to Choose the Right One (2026) covers the tradeoffs across frame designs.
Step 6: Consider Weather and Use Case
Materials and features should match where you hike. A pack that works well in dry desert terrain may struggle in wet forests. If you expect rain, look for a pack with water-resistant fabric or a rain cover. Waterproof Backpack for Hiking: How to Choose One That Keeps Gear Dry and Water Resistant Hiking Backpack: How to Choose One That Keeps Gear Dry explain the difference between water-resistant coatings and fully waterproof construction.
If you carry a camera, look for padded, removable dividers or a dedicated compartment. Camera and Hiking Backpack: How to Choose One That Protects Your Gear covers protection and access features.
Common Mistakes
- Buying by height instead of torso length. Two people of the same height can need very different pack sizes.
- Overloading a lightweight frame. Packs designed for light loads may not handle heavy winter gear.
- Ignoring the hip belt. Shoulder pain often traces back to a belt that is too loose or sitting too high.
- Packing heavy items low or far from the back. This pulls your center of gravity off and makes balance harder.
- Skipping a test walk. Load the pack to your typical weight and walk stairs or a hill in the store if you can.
Recommended gear
- Measuring tape or cord: A flexible tape makes the C7-to-iliac measurement more accurate. View on Amazon
- Pack liners or dry bags: Liners keep gear dry even if the pack fabric lets moisture through. View on Amazon
- Compression straps or packing cubes: These help keep a loaded internal frame pack compact and stable. View on Amazon
FAQ
What does internal frame mean on a hiking backpack?
It means the support structure, usually stays and a frame sheet, is built inside the pack body rather than exposed on the outside. This keeps the load close to your back.
How do I know if I need a larger or smaller pack size?
Measure your torso length and compare it to the manufacturer’s size chart. Choose the size whose range matches your measurement, not your height.
Is an internal frame better than an external frame?
Internal frames generally offer better balance on rough terrain and suit a wider range of body types. External frames can carry heavy, awkward loads more comfortably in some cases.
How much weight can an internal frame backpack carry?
This depends on the model. Check the manufacturer’s stated load rating, and do not exceed it for regular use.
Why does my hiking backpack hurt my shoulders?
Most often the hip belt is loose or positioned too high, so the load falls on your shoulders. Adjust the hip belt first, then tighten the load lifters.
Do I need a rain cover for an internal frame pack?
If you hike in wet conditions, a rain cover or waterproof liner is a practical addition, even if the pack fabric is coated.
Can I use an internal frame pack for day hikes?
Yes, smaller internal frame packs around 20 to 35 liters work well for day hikes, especially if you want stability on rough trails.
Conclusion
A hiking backpack with internal frame works best when the torso length, volume, frame stiffness, and hip belt all match your body and trip. Measure first, then confirm the load rating and fit before you commit. Pack heavy items close to your back and adjust the suspension in order, and most of the comfort problems hikers report can be solved on the spot.
Ready to choose one?
About Colin Foster
Colin Foster is part of our editorial team and reviews and edits our backpacks & packing systems guides, checking product details against manufacturer specifications and owner feedback.