 By Colin Foster
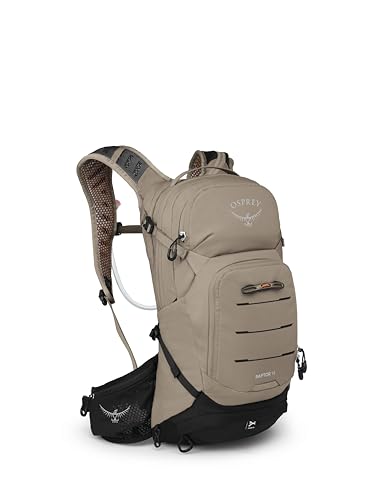
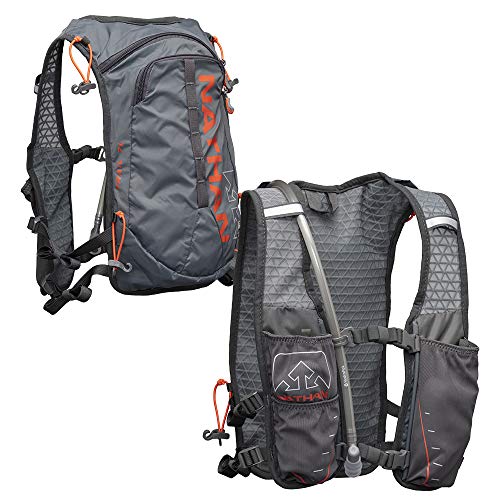
A ski rucksack with hydration pack combines a snow-sports daypack with a built-in water bladder, so you can drink on the uphill and the descent without stopping to dig out a bottle. This guide walks through six decisions that determine whether a pack will actually work on snow: capacity, bladder design, hose routing, back panel ventilation, avalanche gear compatibility and fit. By the end, you will know which specs to check and how to test a pack before you ever clip into a binding.
Step 1: Choose the Right Pack Volume for Your Days
Ski-specific packs usually fall between 15 and 35 liters. Resort skiers who carry a layer, lunch and a water bottle often do well around 15 to 20 liters. Backcountry users who carry a shovel, probe, beacon, first-aid kit and an extra insulated layer usually need 25 to 35 liters. Manufacturers typically list volume in liters, but the real test is whether your gear fits with room to spare for a snack and a shell.
A common mistake is buying a pack that is too small for avalanche tools. Shovels with metal blades and aluminum handles take up a surprising amount of space, and a pack that is stuffed to the top will shift and pull on your shoulders during long traverses.
Step 2: Evaluate the Hydration Bladder and Its Capacity
Most ski hydration packs include a bladder between 1.5 and 3 liters. A 2-liter bladder is a practical middle ground for a full day. Skiing burns more fluid than many people expect, especially at altitude and in dry, cold air, so plan on roughly half a liter per hour of active touring as a starting estimate, and adjust based on how you feel.
Pay attention to bladder construction. Look for:
- A wide mouth opening, which makes filling with snow or from a hut tap easier and simplifies cleaning.
- A removable or rotating cap, so you can keep it clean and avoid freezing.
- A flat or sleeve-style design that sits against the back panel without bunching.
Some packs use a sleeve that places the bladder close to your spine, which keeps water warmer. Others place it in a separate compartment with a dedicated insulated cover. Both approaches work; the sleeve design usually offers better heat retention.
Step 3: Plan Hose Routing and Freeze Protection
The drinking tube is the most common failure point in cold weather. Water inside the hose freezes quickly below about 20°F, and a frozen mouthpiece can stop water flow entirely. Look for these features:
- Insulated or sleeved hose: Foam or fabric insulation slows freezing for much longer.
- A shutoff valve or bite valve with a lock: This stops water from draining back into the bladder and prevents leaks.
- Clip-in routing: Magnetic clips or elastic loops on the shoulder strap keep the hose at chest level, where it stays warmer.
Before a trip, practice blowing water back into the bladder after each sip. This clears the hose and reduces the amount of water left to freeze. Some skiers also carry a small insulated bottle as a backup, which is a sensible option on very cold days.
Step 4: Check Back Panel Design and Ventilation
Ski packs sit against a jacket and base layers, and sweat builds up quickly during climbs. A back panel with an open-cell foam or mesh layer lets moisture escape. Some packs use a suspended mesh system, which keeps the pack off your back entirely. Others use a padded panel with channels. Neither is universally better, but the suspended design tends to feel cooler on sustained climbs, while a padded panel often feels more secure when you carry heavier loads.
Also check whether the pack includes a hip belt. A hip belt transfers weight from your shoulders to your hips and matters most when the pack is loaded above about 10 pounds.
Step 5: Confirm Compatibility With Avalanche Gear and Skis
If you ski in the backcountry, make sure the pack supports your avalanche safety setup. Look for:
- External ski carry options, such as diagonal or A-frame straps, that do not interfere with your hydration hose.
- A dedicated tool compartment for a shovel and probe, ideally accessible without removing the pack.
- Compatibility with an airbag system, if you plan to use one. Some airbag packs have their own hydration sleeves, but not all do. Check the manufacturer’s specifications for the airbag model and cylinder size before buying.
Airbag packs have specific weight and volume requirements. Verify compatibility with the airbag manufacturer and consider taking a avalanche safety course before using any airbag system. Consult a professional guide or avalanche educator for guidance tailored to your terrain.
Step 6: Test Fit Before You Buy or Ski
Fit matters more than any single feature. Measure your torso length from the base of your neck to the top of your hip bones, then compare that to the pack’s sizing chart. Many ski packs come in S, M and L sizes based on torso length. Load the pack with about the weight you plan to carry, then walk, squat and bend. The hydration bladder should sit flat, the hose should reach your mouth without strain, and the shoulder straps should not pull backward.
Quick Checklist Before You Buy
- Volume matches your typical day (15–20 L resort, 25–35 L backcountry)
- Bladder capacity suits your fluid needs (around 2 L for a full day)
- Wide-mouth bladder with easy-clean design
- Insulated hose with a shutoff or lock valve
- Ventilated back panel suited to your climate
- Tool and ski carry options that fit your safety setup
- Torso measurement matches the sizing chart
Common Mistakes
- Ignoring hose freeze protection. A pack that works in 40°F weather may fail at 10°F without insulation.
- Filling the bladder with hot water. Hot water can damage some bladder materials and seals. Use lukewarm water or let the bladder cool before filling.
- Overloading the top compartment. Heavy items above the shoulder line pull the pack backward and cause fatigue.
- Skipping a test fill. Fill the bladder at home and check for leaks at the cap, seams and hose connection.
- Buying by volume alone. Two 25-liter packs can feel very different depending on frame design and back panel shape.
Recommended gear
Several product types pair well with a ski rucksack with hydration pack and help keep fluid flowing on cold days.
- Insulated bladder sleeve or cover: Adds a layer of warmth around the bladder and slows heat loss on long tours. View on Amazon
- Hose insulation sleeve: Foam or neoprene sleeves protect the drinking tube from freezing when the pack is worn outside a jacket. View on Amazon
- Wide-mouth bladder cleaning kit: Brushes and tablets help keep the bladder free of odor and residue, which matters during multi-day trips. View on Amazon
Tips for Getting the Most From Your Pack
- Keep the bladder in the insulated sleeve and the hose inside your jacket collar when temperatures drop.
- Drink small amounts often rather than large volumes at once. This keeps you hydrated without overloading your stomach during climbs.
- Carry a spare mouthpiece cover or bite valve. These parts wear out and are easy to lose.
- Dry the bladder fully after each trip, with the cap open, to prevent mildew.
For broader pack selection advice, see Best Backpack for Through Hiking: How to Choose the Right Pack for a Long Trail, which covers fit and load considerations that also apply to ski packs. If you are comparing packs across activities, 7 Best Top Rated Running Hydration Packs (2026): Expert Picks shows how bladder design differs between running and winter models.
FAQ
How much water should I carry in a ski hydration pack?
Most skiers do well with a 2-liter bladder for a full day. Active backcountry touring at altitude may require more, so plan around half a liter per hour as a starting point and adjust to your conditions.
Will the water in the hose freeze?
It can, especially below about 20°F. An insulated hose, a shutoff valve and blowing water back into the bladder after each sip all reduce the risk significantly.
Can I use a hot water bottle in the bladder?
Avoid very hot water. Lukewarm water is safer for most bladder materials and seals, and it stays drinkable longer in cold weather.
Is a ski hydration pack the same as a regular hiking hydration pack?
Not exactly. Ski packs usually have ski carry straps, insulated bladder compartments and hose designs built for cold temperatures. Hiking packs may lack these features.
Do I need a hip belt on a ski pack?
A hip belt helps when the pack is loaded heavily, especially with avalanche tools. For light resort loads, it is optional.
Can I carry an airbag system in any ski hydration pack?
No. Airbag compatibility depends on the pack design and the airbag model. Check the manufacturer’s specifications and consult an avalanche safety professional before buying.
How do I clean a ski hydration bladder?
Rinse after each use, scrub with a bladder brush and use a cleaning tablet periodically. Dry the bladder completely with the cap open before storing.
What size ski pack should I buy?
Measure your torso from the base of your neck to your hip bones, then match that number to the pack’s size chart. Fit in the store or at home with a load before committing.
Conclusion
A well-chosen ski rucksack with hydration pack keeps you drinking and moving efficiently through cold, demanding days. Focus on volume, bladder design, hose freeze protection, back panel comfort and avalanche gear compatibility. A careful fit check and a simple cold-weather routine will do more for your comfort than any single feature.
Related reading
- Travel Pack With Daypack: 5 Best Options for Trips in 2026
- North Face Backpack Hiking: How to Pick the Right Pack in 6 Steps
- How to Pack a Dress or Formalwear Without Wrinkles
Ready to choose one?
About Colin Foster
Colin Foster is part of our editorial team and reviews and edits our backpacks & packing systems guides, checking product details against manufacturer specifications and owner feedback.