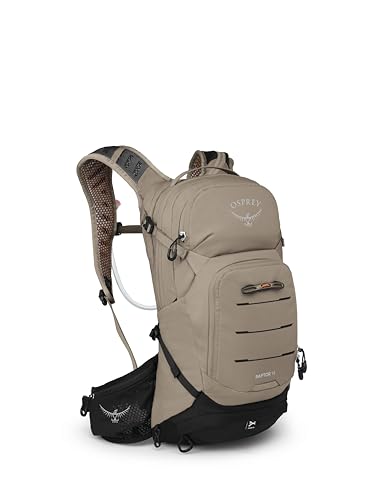
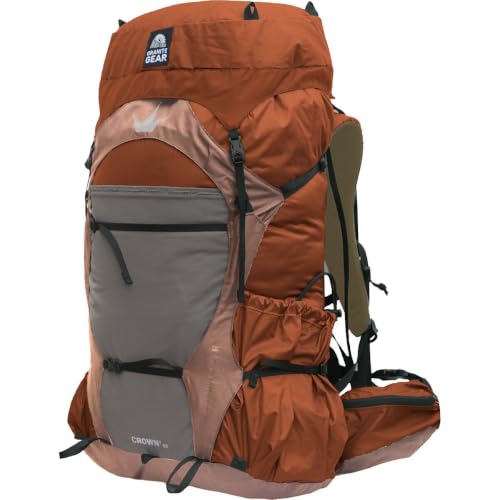
 By Colin Foster
An academy sports hiking backpack can handle everything from a single-night trail trip to a full weekend in the backcountry, but only if you pick the right size, fit and feature set for how you actually hike. This guide walks you through the decisions that matter most: capacity, torso fit, load-carrying ability, weather protection and organization. By the end, you will know how to narrow down a shortlist and check whether a pack will be comfortable before you ever leave the store.
Start With Your Trip Length and Pack Volume
Volume is the first filter, and it is easy to get wrong. Most people overbuy. A pack that holds 60 liters feels roomy in a store, then tempts you to carry gear you do not need. Match capacity to the trips you take most often, not the trip you dream about once a year.
Shopping for one? See our guide: 4 Best Hiking Backpack Women's (2026): Expert Picks.
- Day hikes (under 8 hours): 20 to 30 liters is usually enough for water, snacks, layers and a first aid kit.
- Overnight trips (1 to 2 nights): 35 to 45 liters covers a lightweight shelter, sleep system and food for a short trip.
- Multi-night trips (3 to 5 nights): 50 to 65 liters is the typical range, especially if you carry a bear canister or extra food.
- Long or winter trips: 65 liters and up, with the understanding that heavier loads need a stronger frame.
Keep in mind that manufacturers measure volume differently, and a pack rated at 50 liters may feel smaller or larger than a competitor’s 50-liter model. Use the number as a rough guide, then check the pack’s dimensions and compartment layout.
Measure Your Torso Length Before You Buy
Torso length matters more than height. A pack that is too long will sit on your hips awkwardly and push weight onto your shoulders. A pack that is too short will sit high and make the hip belt useless. Most adult hiking packs come in two or three torso sizes, so measuring correctly will save you a return.
How to Measure Torso Length
- Have a helper stand behind you, or use a flexible measuring tape and mark your position carefully.
- Locate the bony bump at the base of your neck (the C7 vertebra). Tilt your head forward and feel for it.
- Find the top of your hip bones (the iliac crests). Place your thumbs on them, with your fingers pointing forward.
- Measure from the C7 bump straight down to the line between your thumbs. That distance is your torso length.
- Match that number to the size chart for the specific pack model. Sizing charts vary by brand, so always use the one for the exact model you are considering.
Check How the Pack Carries Weight
Once you have the right volume and torso size, look at the suspension. A well-built frame transfers most of the load to your hips, which is where your legs and core can handle it. A poor frame lets the weight hang on your shoulders, and that is what causes fatigue and sore neck muscles.
Key Suspension Features
- Hip belt padding: Look for dense foam that wraps around the hip bones. A belt that is too thin will bruise you on longer days.
- Load lifters: These straps connect the top of the pack to the shoulder harness. They pull the load closer to your back when tightened.
- Frame type: Internal frames with aluminum or plastic stays work well for packs carrying 25 pounds or more. Lighter packs often use a frame sheet or no frame at all.
- Shoulder straps: They should curve around the chest without digging in. Adjustable sternum straps help keep them in place.
- Back panel ventilation: Mesh panels and channels reduce sweating, which matters in warm weather.
Loading the Pack Correctly
Even the best suspension will feel bad if you load it poorly. Put heavy items, such as food bags, water and cooking gear, close to your back and centered between your shoulder blades. Keep lighter, bulkier items like a sleeping bag at the bottom. Store things you need during the day, including rain gear, snacks and a map, in the top lid or side pockets.
Evaluate Weather Protection and Materials
Most packs in this category use nylon or polyester fabrics, often with a durable water repellent (DWR) finish. A DWR coating helps water bead off the surface, but it does not make the pack waterproof. Heavy rain will still soak through seams and zippers unless the pack has a rain cover or a waterproof liner.
If you hike in wet climates, consider a pack with a built-in rain cover or plan to line the interior with a dry bag. Pay attention to the zippers as well. Water-resistant zippers are better than standard zippers, and covered zippers offer extra protection.
Organize Your Gear With Packing Cubes
Good organization makes a pack feel smaller and lets you find things quickly. Packing cubes are one of the simplest ways to separate clothing, food and gear inside the main compartment. Use one cube for sleep layers, another for camp clothes and a third for food. Compression cubes can also reduce bulk when you carry soft items like clothing.
Step-by-Step Checklist for Choosing Your Pack
- List the trip lengths you take most often and set a target volume range.
- Measure your torso length and note the matching size for each candidate pack.
- Confirm the hip belt fits snugly around your hip bones, not your waist.
- Check that the shoulder straps curve naturally and do not gap or dig in.
- Load the pack with about 75 percent of your typical gear and walk around the store for at least 10 minutes.
- Test sitting down, bending over and reaching overhead while wearing the loaded pack.
- Review the zippers, pockets and attachment points for the features you will actually use.
Common Mistakes
- Buying by volume alone: A 60-liter pack that fits badly will hurt more than a well-fitting 50-liter model.
- Skipping the fitting: Trying on an empty pack tells you very little. Always test with weight.
- Ignoring torso length: Height does not determine pack size. Measure your torso.
- Overpacking: Extra capacity tempts you to carry extra weight. Start light and add only what you need.
- Assuming water resistance is waterproof: Plan for wet conditions with liners or covers.
- Overtightening straps: Cinching everything tight can cause pressure points. Adjust gradually until the load feels balanced.
Tips for Getting the Most From Your Pack
- Break in a new pack on a few shorter hikes before taking it on a long trip.
- Adjust the hip belt first, then the shoulder straps, then the load lifters, in that order.
- Keep a small repair kit with spare buckle clips, a few zip ties and fabric tape.
- Clean the pack after muddy or salty trips to prevent fabric breakdown and odor.
- Store the pack loosely, not compressed, to preserve the foam and frame.
Recommended gear
A few accessories can make a store-bought pack work better on the trail. Choose items based on the conditions you expect and the features your pack lacks.
- Waterproof pack liner: A roll-top dry bag placed inside the pack keeps clothing and sleep gear dry if rain gets through the seams. View on Amazon
- Compression packing cubes: These separate clothing and food and reduce the bulk of soft items inside the main compartment. View on Amazon
- Pack rain cover: A fitted cover adds protection in heavy rain if your pack does not include one. View on Amazon
If you are comparing options that also include waterproof designs, the guide 9 Best North Face Waterproof Daypack Options for Wet Weather Hiking covers how water-resistant fabrics and seams differ across daypacks, which can help you decide how much weather protection you need.
FAQ
What size academy sports hiking backpack do I need for a day hike?
For most day hikes, a pack in the 20 to 30 liter range is enough to carry water, snacks, layers and a basic first aid kit. Larger packs work too, but they tend to encourage carrying extra weight.
How do I know if a hiking backpack fits me?
Measure your torso length, then load the pack with about 75 percent of your typical gear. The hip belt should rest on your hip bones, the shoulder straps should curve without gaps, and the weight should feel balanced when you walk.
Is a water-resistant pack the same as a waterproof pack?
No. Water-resistant packs shed light rain and splashes but can leak in heavy downpours or through seams and zippers. For wet conditions, use a rain cover or a waterproof liner.
How much weight can a hiking backpack carry comfortably?
Manufacturers often list a recommended maximum load. Many lightweight packs are designed for loads around 20 pounds or less, while packs with internal frames may handle 30 pounds or more. Check the specifications for the exact model.
Should I use an internal or external frame?
Most modern hiking packs use internal frames, which keep the load close to your body and suit a wider range of activities. External frames are less common today but can offer good ventilation and load support for heavier packs.
How often should I clean my hiking backpack?
Clean it after trips where it gets muddy, wet or exposed to salt. A routine wipe-down after each hike and a fuller wash every few months will help the fabric last longer.
Do I need a backpack with a hydration reservoir sleeve?
A hydration sleeve is useful if you plan to carry a bladder, which makes drinking easier on the move. If you prefer bottles, make sure the pack has side pockets sized for them.
Conclusion
Choosing an academy sports hiking backpack comes down to matching volume, torso fit, suspension and weather protection to the trips you take. Measure your torso, test the pack with a realistic load, and check that the features you need are actually there. A pack that fits well and carries weight comfortably will serve you far longer than one chosen on looks or capacity alone.
Related reading
- Waterproof Backpack for Hiking: How to Choose One That Keeps Gear Dry
- Water Resistant Hiking Backpack: How to Choose One That Keeps Gear Dry
- North Face Backpack Hiking: How to Pick the Right Pack in 6 Steps
- Camera and Hiking Backpack: How to Choose One That Protects Your Gear
- Best Photography Backpack for Hiking: 7 Factors and Packing Tips
Ready to choose one?
About Colin Foster
Colin Foster is part of our editorial team and reviews and edits our backpacks & packing systems guides, checking product details against manufacturer specifications and owner feedback.