 By Colin Foster
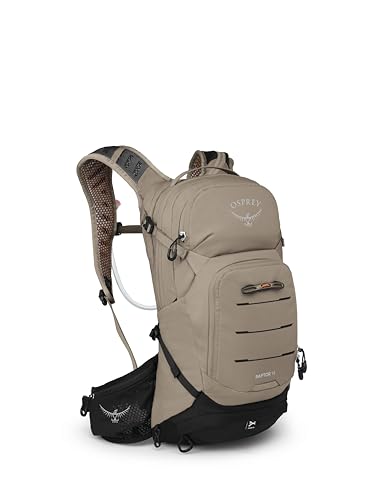
A camera and hiking backpack is a single pack built to carry your camera body, lenses, and accessories alongside your water, food, and layers on a day or multi-day hike. In this guide, you will learn how to size the pack for your kit, how to set up the interior so your gear stays protected and reachable, and how to keep total weight under control. By the end, you should be able to pick a camera and hiking backpack that fits your body, your trips, and your photography style.
Start With Your Carry Load, Not the Brand
Most buying mistakes happen because people shop for a pack before they know what it has to hold. Before you compare models, write down everything you plan to carry on a typical outing. Weigh what you can, and estimate the rest using manufacturer spec sheets.
Shopping for one? See our guide: 4 Best Hiking Backpack Women's (2026): Expert Picks.
- List your camera body, lenses, flash or light, filters, batteries, memory cards, and cleaning kit.
- Add your hiking essentials: water (roughly 1 liter per hour of moderate hiking in warm weather), food, first aid, rain shell, insulating layer, and navigation.
- Add a rough weight for each item and total the figures.
- Subtract the camera gear from the total to see how much room the hiking side needs.
A camera-heavy kit with a long telephoto lens can easily exceed 10 pounds before you add food and water. That number decides whether you need a 20-liter daypack or a 35-liter pack with a more supportive frame.
Choose the Right Volume and Fit
Volume is measured in liters, and a camera and hiking backpack is often roomier than a standard daypack because of the padded dividers. Use the table below as a starting point.
| Trip type | Typical capacity | Camera setup that fits |
|---|---|---|
| Short local hike, 2 to 4 hours | 15 to 25 liters | One body with a mid-range zoom, small accessories |
| Full day hike or photo outing | 25 to 35 liters | Two bodies or a body plus two or three lenses |
| Overnight or multi-day with camera | 35 to 50 liters | Full kit plus sleeping layers and food |
Fit matters as much as volume. Load the pack with your real kit, then check these points:
- The hip belt should sit on your iliac crest, the bony top of your hip, and carry most of the weight.
- Shoulder straps should wrap your shoulders without gapping at the top, and the sternum strap should sit across your chest without pinching.
- The torso length should match your spine, which you can measure from the C7 vertebra at the base of your neck to the top of your hip bones.
- Your arms should swing freely without the pack pulling on the camera straps.
Set Up the Interior for Protection and Access
Use Padded Dividers and Lens Pockets
Look for a removable padded insert with adjustable dividers. The best setups let you create compartments sized for each lens, so nothing shifts or knocks together on rough ground. Lens pockets that hold the lens upright are useful for longer glass.
Keep the Camera Accessible Without Removing the Pack
A side access zip or a top-loading front pocket lets you grab the body quickly. Many photographers prefer a pack with a side or rear access panel so they can reach the camera from the back of the pack while keeping the front closed in the rain. Test this at home: can you get the body out in under five seconds while still wearing the pack?
Plan the Hiking Side Separately
Put water, food, and layers in the main compartment or hydration sleeve, and keep the camera section sealed off. This also means heavy items sit close to your back, which improves balance.
Manage Weight and Balance on the Trail
Once the pack is full, weight distribution determines how it feels after two hours. Place heavier items, such as a telephoto lens or spare batteries, in the center of the pack and close to your back. Lighter items like rain gear go toward the outside or top. Avoid stacking the heaviest lens at the top, since that pulls the pack backward and strains your shoulders.
If you carry two camera bodies or a large tripod, consider a frame or external attachment points rather than forcing everything inside. Keep an eye on total pack weight. Many hikers aim for under 20 percent of body weight for day trips, though needs vary with terrain and experience. If you have a back or shoulder condition, consult a physical therapist or medical professional before carrying a heavy load.
Weatherproofing and Trail Conditions
Camera gear dislikes moisture, sand, and sudden temperature changes. Look for water-resistant fabric, a rain cover, and a roll-top or zippered closure with a storm flap. For wet hiking, you may also want waterproof liners or dry bags inside the camera compartment. Our related guide on 9 Best North Face Waterproof Daypack Options for Wet Weather Hiking covers how waterproofing ratings and seam construction affect real-world performance.
Common Mistakes
- Buying a pack that fits the camera but not your torso length, which leads to sore shoulders within an hour.
- Choosing a pack with no separate hydration sleeve, forcing water bottles to sit against the camera section.
- Overloading a daypack beyond its design limit, which compresses the padding and stresses the zippers.
- Packing the heaviest lens at the top of the pack, which shifts the center of gravity backward.
- Ignoring access speed, so the camera is buried under layers when a wildlife shot appears.
- Skipping a trial load at home before a long hike.
Tips for a Better Setup
- Pack the camera section first, then fill the gaps with layers so they act as cushioning.
- Carry a small microfiber cloth and a lens cover in an outside pocket so you never have to open the main compartment in dust or spray.
- Use a dedicated memory card wallet so cards stay organized and easy to find.
- Walk around with the loaded pack for 20 minutes, including a few uphill sections, before committing to a long trip.
Recommended Gear
- Lowepro or similar camera hiking pack with removable dividers: The padded, configurable interior lets you size compartments to each lens and body, which reduces movement and impact damage. View on Amazon
- Dry bag or waterproof camera liner: A simple inner liner protects electronics from rain, splashes, and sweat during long days. View on Amazon
- Hydration bladder with a dedicated sleeve: Keeping water separate from the camera zone prevents leaks and helps balance. View on Amazon
- Memory card wallet: A small case keeps cards sorted and protected from moisture and loss. View on Amazon
FAQ
Can I use a regular hiking backpack for my camera?
Yes, but a regular pack usually lacks padded dividers, so you will need to add a camera insert or pouches to protect your gear. A purpose-built camera and hiking backpack is easier to organize.
What size pack do I need for a DSLR and two lenses?
For a body with two lenses plus water and a light layer, a 25 to 35 liter pack is a common range. Check that the interior dividers fit your specific lens sizes before buying.
How do I keep my camera dry in a hiking backpack?
Use a rain cover, a waterproof inner liner or dry bag, and keep the pack closed with the storm flap down. Seal memory cards and batteries in separate bags as an extra layer.
Is a hip belt necessary for a camera pack?
For loads above about 10 pounds, a padded hip belt is strongly recommended because it moves weight off your shoulders and onto your hips.
Should I carry a tripod on the outside of the pack?
Many packs include external straps for a tripod. Keep the load secure and low to maintain balance, and check that the tripod does not snag branches or brush on the trail.
How do I avoid back pain with a heavy camera pack?
Fit the pack carefully, keep the heaviest items close to your back, and reduce total load where possible. If pain persists, consult a physical therapist or doctor.
Can I fly with a camera and hiking backpack?
Many photographers carry these packs as carry-on items, but airline size and weight rules vary. Check your airline’s current policy before you travel.
Conclusion
A good camera and hiking backpack starts with an honest inventory of your gear and hiking needs. Match the volume and fit to your trips, set up the interior so your equipment is protected and reachable, and keep weight balanced. Test your setup at home before the trail, and adjust as your kit changes.
Related reading
- Waterproof Backpack for Hiking: How to Choose One That Keeps Gear Dry
- Water Resistant Hiking Backpack: How to Choose One That Keeps Gear Dry
Ready to choose one?
About Colin Foster
Colin Foster is part of our editorial team and reviews and edits our backpacks & packing systems guides, checking product details against manufacturer specifications and owner feedback.